|
Step-by-step tips on how to create a private network between your Virtual Machines.
Portal Login Explained
If you login to the portal website using your email address and account level password you can administer all your VPSs, change account details, place new orders etc.
If you login to the portal website using your VPS username and VPS password you will only have access to manage a single VPS, no mention of VPSBlocks is made, and no ability to modify your account or order services.
You MUST login using your email address and account level password to be able to manage private internal networks.
How to create a private internal network
- Login to the VPSBlocks My Account Portal using your email address and account level password.
- Click on 'Internal Networks' on the left hand menu
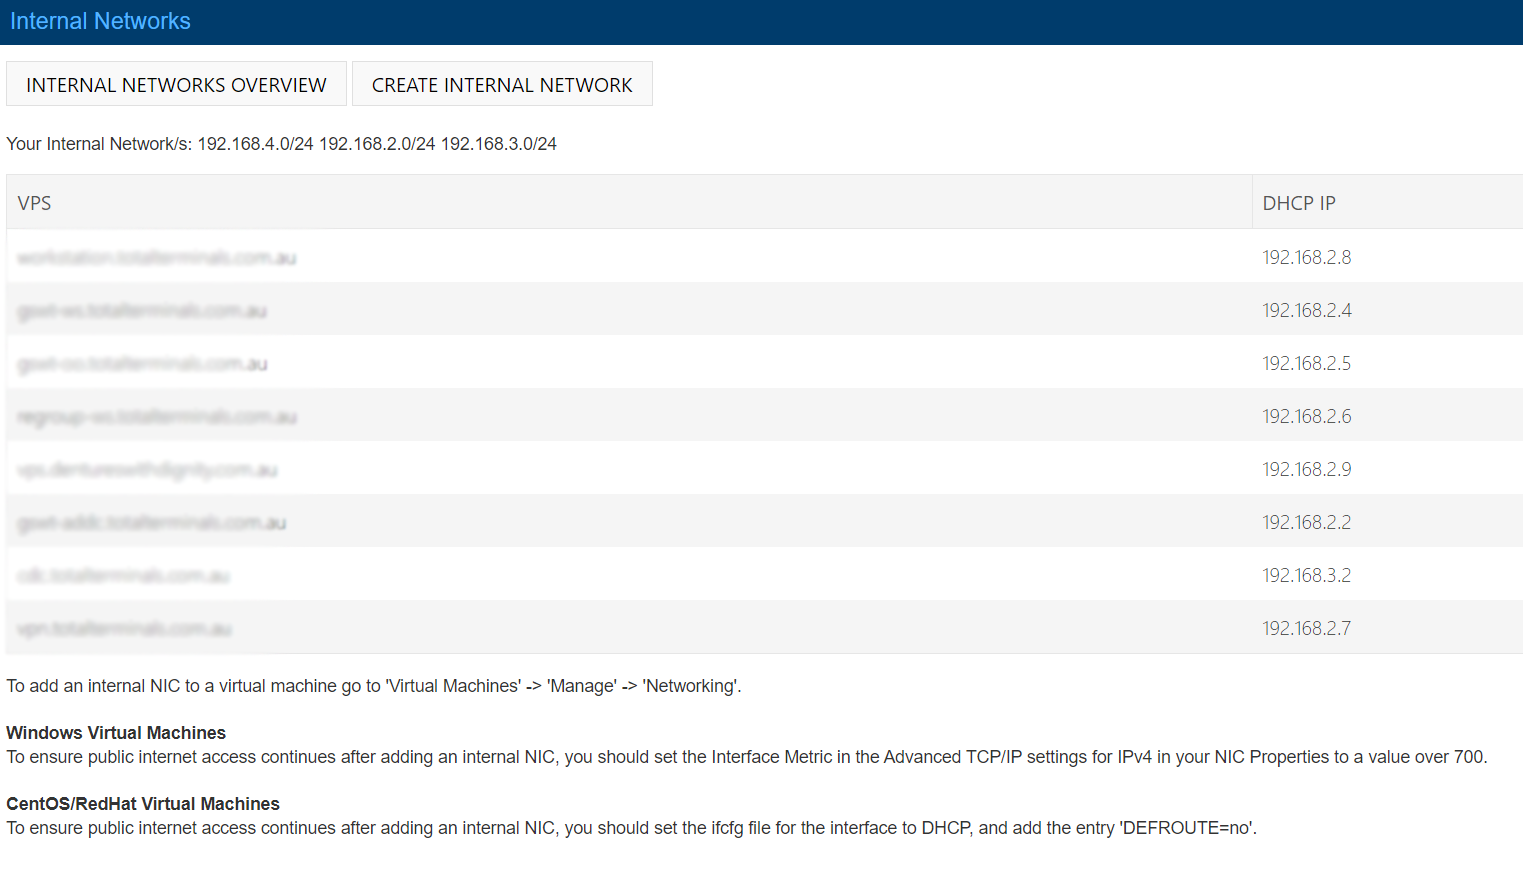
- If you have an internal network created it will display the IP Range of your network, it will also list any virtual machines already connected to the network. If not click on 'Create Internal Network'. Provide an internal range (e.g. 192.168.2.0), note always use .0 on the end as the network will be automatically setup with a /24 subnet providing you with the ability to connect up to 254 machines.
- You can create multiple private networks for isolating between different servers via subnets.
- Now you have a virtual network, you need to add an internal network adapter to your virtual machines.

Adding a private internal NIC to your VMs
- Click on 'Virtual Machines' on the left hand menu
- Click on 'Manage' next to the virtual machine you want to add an internal NIC
- At this stage the virtual machine must be powered off (shutdown), you can do this through the 'Power Off VPS' button, or do it through the operating system on your virtual machine. Once it's shut down continue to step 4.
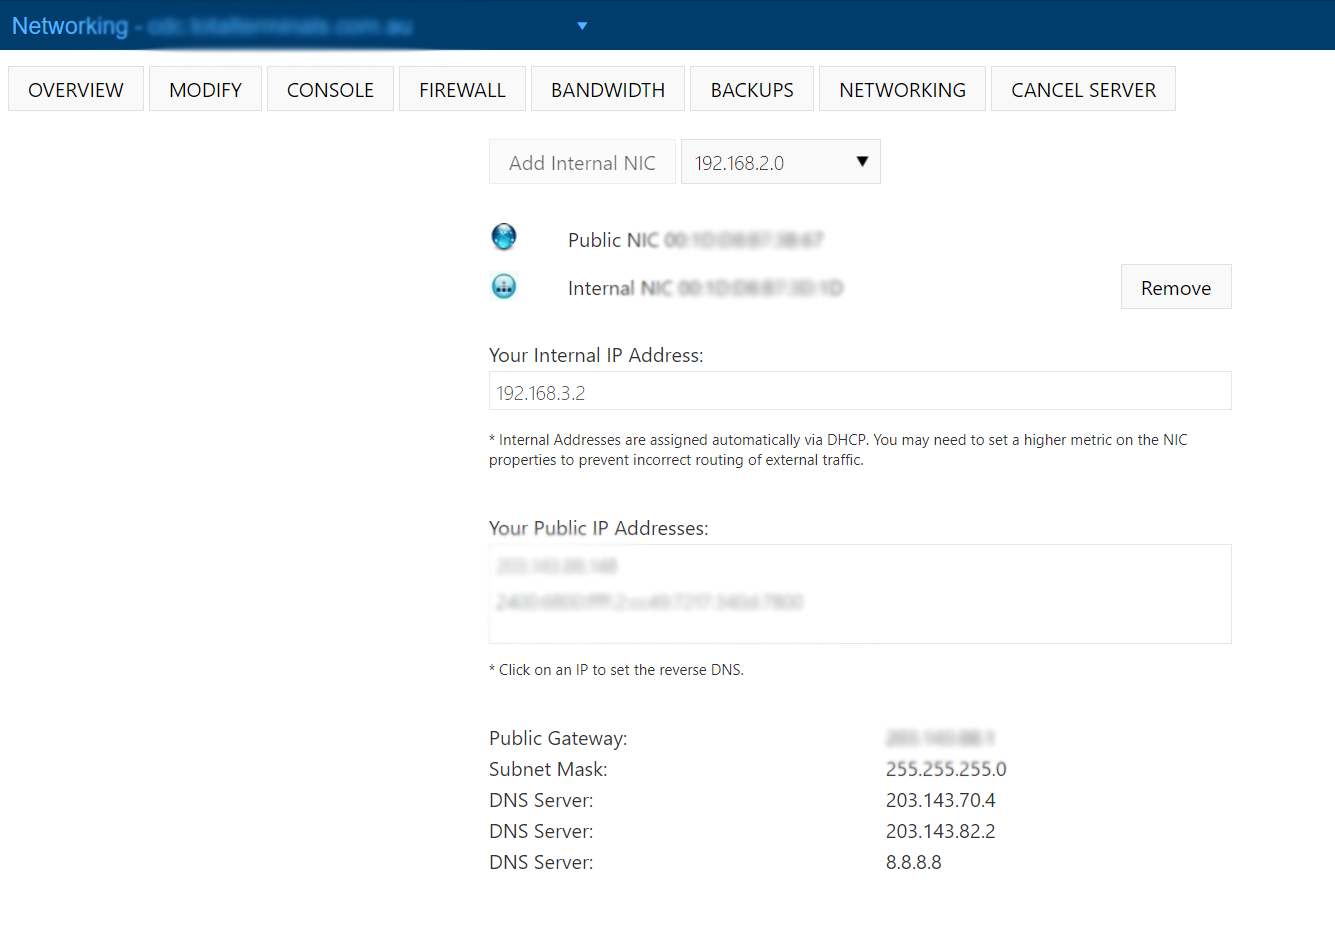
- Click on the 'Networking' button
- Click 'Add Internal NIC'
- This will add an internal NIC to your virtual machine and automatically assign it an IP address from your internal range (this IP cannot be changed). The NIC will use DHCP, however, further configuration is necessary on both Windows and Linux platforms.
- You can now start your server again (click 'Overview' and 'Power On VPS')

Final configuration within your virtual machine
- If you are running Windows on the virtual machine you will need to set the new NIC's metric to be higher than the default, this is so your system knows which NIC to send public traffic through. Please see: https://www.vpsblocks.com.au/support/Knowledgebase/Article/View/294/0/internal-private-networking-on-windows
- If you are running CentOS or RedHat you will need to create a configuration file at /etc/sysconfig/network-scripts/ifcfg-eth1 (usually it is eth1) and ensure the DEFROUTE is set to No. Please see: https://www.vpsblocks.com.au/support/Knowledgebase/Article/View/314/0/nic-configuration-on-redhat-and-centos
- If you are running Ubuntu or Debian you will need to edit /etc/network/interfaces file and add the configuration for the new NIC, ensuring it is set to use DHCP.
If you are unsure how to configure your internal NIC properly please contact support and we would be happy to help.
| 
